Exploring the World of Resin Art Projects: A Comprehensive Review
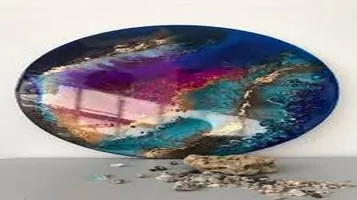
Resin art projects involve the use of liquid resin—a versatile, glossy substance—mixed with hardeners to create stunning artworks and functional pieces. Artists pour, layer, and manipulate the resin, often incorporating vibrant pigments, dyes, and additives like glitter or metallics to achieve mesmerizing effects. Once mixed, the resin begins to harden, allowing for the creation of smooth, glass-like surfaces that enhance the depth and vibrancy of colors. Resin art is popular for making unique pieces such as coasters, jewelry, wall art, and furniture. The process offers endless creative possibilities, from abstract designs to intricate patterns, making it accessible for artists of all levels. Its durability and unique finish make resin art a cherished choice for both decorative and practical applications.

Resin art has taken the creative world by storm, captivating artists and hobbyists alike with its glossy finishes, vibrant colors, and endless possibilities. If you're contemplating diving into the world of resin art projects, this review will provide an in-depth look at what to expect, the tools and materials you'll need, and some insights into the creative process.
Introduction to Resin Art
Resin art involves the use of epoxy resin—a two-part compound consisting of resin and hardener—that, when mixed, creates a durable, glass-like surface. This medium is prized for its versatility and ability to encapsulate various materials, from pigments and paints to glitter and natural elements like flowers and stones. The result is a stunning piece of art that can range from abstract designs to intricate, detailed works.
Getting Started: Tools and Materials
One of the first steps in resin art is gathering the necessary tools and materials. The essentials include:
1. Epoxy Resin and Hardener: The cornerstone of any resin project. Brands like ArtResin, ProMarine Supplies, and Alumilite are popular choices, each offering different pot times (working time before the resin begins to harden) and curing times.
2. Protective Gear: Safety is paramount when working with resin. Gloves, safety glasses, and a well-ventilated workspace are crucial to protect against potential skin irritation and fumes.
3. Mixing Containers and Sticks: Disposable cups and wooden sticks are ideal for mixing resin and hardener. Silicone measuring cups are also available and can be reused.
4. Pigments and Dyes: These come in various forms, such as liquid, powder, or paste, and are used to add color to your resin. Brands like Jacquard, Pinata, and ResinTint offer a plethora of options.
5. Molds: Silicone molds are perfect for creating coasters, jewelry, and other small items. For larger projects like tabletops or wall art, a sturdy, flat surface covered with a non-stick material like wax paper or silicone mats is essential.
6. Heat Gun or Torch: These tools help to remove bubbles that form in the resin mixture, ensuring a smooth, glass-like finish.
The Creative Process
Embarking on a resin art project can be both exhilarating and intimidating. Here’s a step-by-step overview to help you navigate the process:
1. Prepare Your Workspace: Ensure your area is clean, dust-free, and well-ventilated. Lay down protective coverings to catch any spills.
2. Mix the Resin and Hardener: Follow the manufacturer’s instructions for the correct ratio. Mix thoroughly to avoid any soft spots or incomplete curing.
3. Add Pigments and Dyes: Once your resin is mixed, add your chosen pigments or dyes. Experiment with different color combinations and effects, such as swirling or layering, to achieve your desired look.
4. Pour and Spread: Pour the resin onto your surface or into your mold. Use tools like spatulas or brushes to spread the resin evenly. For larger pieces, a leveling tool can help ensure a smooth surface.
5. Remove Bubbles: Use a heat gun or torch to pass over the surface of the resin, popping any bubbles that rise to the top. Be careful not to overheat, as this can cause the resin to burn or discolor.
6. Curing: Allow your piece to cure according to the resin manufacturer’s instructions. This can take anywhere from 24 to 72 hours. During this time, keep your work area dust-free to avoid particles settling on the resin.
Challenges and Rewards
Like any art form, resin art comes with its own set of challenges. The timing and precision required can be daunting for beginners. Mixing ratios must be exact, and working within the pot time requires efficient planning and execution. Additionally, achieving a bubble-free finish may take some practice.
However, the rewards far outweigh the challenges. The satisfaction of creating a piece with a mirror-like finish and vibrant colors is unparalleled. Resin art allows for immense creativity—whether you’re embedding objects, experimenting with abstract designs, or creating functional art like coasters and trays.
Conclusion
Resin art projects offer a unique and rewarding creative outlet. The ability to produce stunning, durable pieces makes it a favorite among artists and DIY enthusiasts. While the learning curve may be steep, the array of online tutorials, workshops, and community forums can provide ample support and inspiration.
If you're ready to explore a medium that combines science with art, resin projects might just be the perfect adventure. With patience, practice, and a bit of creativity, you'll soon be producing beautiful, one-of-a-kind pieces that capture the magic of resin art.


